
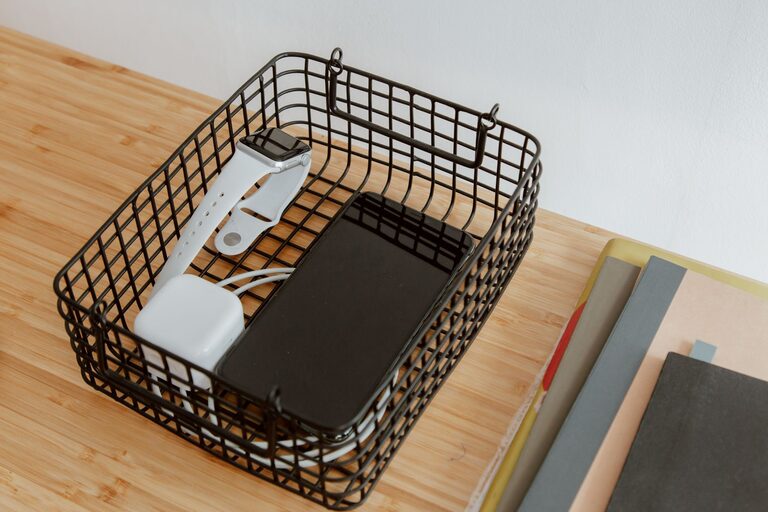
How to Set Up a Safe, Tidy Charging Station
A dedicated charging station can make daily routines easier and reduce the clutter of loose cables around your home or office. Instead of searching for chargers or using different outlets in every room, you can keep commonly used devices and accessories in one organised location.
The best charging station does not need to be expensive or complicated. With a suitable location, reliable power equipment, and a little cable management, you can create a practical setup that works for phones, tablets, watches, headphones, cameras, and other rechargeable devices.
Choose the Right Location
Start by deciding where the charging station will be used most often. A convenient location makes it more likely that everyone will return devices to the station when they are finished using them.
Good locations may include:
– An entryway table for phones, keys, and wearable devices
– A bedside table for overnight charging
– A home office desk for computers and accessories
– A kitchen counter for shared household devices
– A family room shelf for tablets, headphones, and game controllers
Choose a dry, well-ventilated area away from sinks, heaters, direct sunlight, and places where liquids may spill. The surface should be stable and large enough to hold the power equipment and the devices being charged.
If children or pets could reach the station, consider placing it higher up or using a covered organiser. Keep cables away from walkways and areas where they could be pulled accidentally.
Make a List of Devices
Before buying accessories, list the devices that need to be charged regularly. This helps you avoid buying too many cables or choosing a charging hub with too few ports.
Your list might include:
– Smartphones
– Tablets and e-readers
– Smartwatches
– Wireless earbuds and headphones
– Cameras
– Portable game devices
– Laptops
– Power banks
– Rechargeable lights or other small electronics
Check the charging connection used by each device. Many modern devices use USB-C, while others may use a different connector or a device-specific cable. Some laptops and larger electronics may require more power than a basic USB charger can provide.
A short inventory also helps you decide whether you need one central station or separate stations for different parts of the home.
Select a Suitable Power Source
A charging station generally needs either a multi-port wall charger, a powered charging hub, or a power bar with built-in USB ports. Select equipment from a reputable manufacturer and make sure it is designed for the number and type of devices you plan to connect.
When choosing a charger or hub, consider:
– The number of available ports
– The type of ports provided
– The total power output
– The length of the power cord
– Built-in protection features
– The size and shape of the unit
Avoid choosing a charger based only on the number of ports. If several devices are connected at the same time, the available power may be shared between them. Check the manufacturer’s information to understand how the power is distributed.
For laptops and other higher-powered devices, confirm that the charger supports the required output. A small phone charger may not be suitable for charging a laptop.
Decide Between a Ready-Made Station and a DIY Setup
There are two common ways to create a charging station.
Ready-made charging organisers
Ready-made stations often include slots for phones and tablets, cable openings, and space for a multi-port charger. They are a good choice if you want a quick, neat solution with minimal assembly.
Look for a design that:
– Holds devices securely
– Allows cables to reach each slot
– Has enough space for protective cases
– Provides ventilation around the charger
– Is easy to clean
DIY charging stations
A DIY station can be made from a small shelf, drawer organiser, desktop tray, or storage box. Add cable openings or clips to guide each cable to the right location.
Choose materials that are sturdy and non-flammable. Do not place a charger inside a sealed container or cover it with fabric, paper, or other materials that could restrict airflow.
Organise the Cables
Cable management is one of the most important parts of a charging station. Loose cables can become tangled, fall behind furniture, or be damaged when pulled.
Try these simple techniques:
– Use short cables when the charger is close to the devices
– Label both ends of similar cables
– Use reusable cable ties or hook-and-loop straps
– Add adhesive cable clips to guide wires along the back of a desk
– Store spare cables in a labelled box
– Keep one cable for each regular device when possible
Avoid sharply bending cables near the connector. Repeated bending can damage the cable and make charging unreliable. Replace cables that are frayed, split, unusually hot, or loose at the connector.
If your station includes multiple similar cables, label them by device or use. For example, labels such as “tablet,” “headphones,” or “camera” make it easier for everyone to choose the correct cable.
Add Device Storage
A charging station works best when it also provides a place to store devices. Slots, baskets, trays, and small shelves can keep devices upright and reduce the chance of them being knocked onto the floor.
Keep heavier devices on a stable surface rather than balancing them on top of smaller ones. If you are charging several devices in a vertical organiser, make sure the organiser cannot tip over.
For devices that become warm during use or charging, leave space around them. Do not stack devices on top of one another while they are charging, and avoid covering them with clothing, blankets, or papers.
Build in Safe Charging Habits
Good charging habits help protect your devices and keep the station in good condition.
Follow these basic practices:
– Use the charger and cable recommended by the device manufacturer when possible
– Inspect chargers and cables regularly
– Keep the station dry
– Unplug damaged equipment
– Do not overload a power bar or wall outlet
– Avoid charging devices on soft surfaces such as beds or sofas
– Keep chargers away from heat sources
– Disconnect equipment that is not needed for long periods
– Follow the manufacturer’s instructions for charging and storage
A power bar should not be connected to another power bar. If you need more outlets, have the layout reviewed by a qualified electrician rather than using multiple connected power bars or extension cords.
Plan for Shared Use
If several people use the charging station, make it easy to see where each device belongs. You can assign spaces by person, device type, or charging connector.
A simple arrangement might include:
– One section for phones
– One section for tablets and e-readers
– One section for headphones and watches
– A separate area for laptop chargers
– A small tray for spare cables and adapters
A label or small sign can remind users to return cables after use. You may also want to set a routine for removing fully charged devices, especially if the station is in a busy area.
Review and Improve the Setup
After using the station for a week or two, check what is working and what is not. You may discover that some cables are too short, certain devices need a different location, or the station needs more storage.
Make small adjustments such as:
– Replacing overly long cables
– Adding a cable clip or label
– Moving the station closer to a commonly used outlet
– Separating work and personal devices
– Adding a second station for another room
– Removing chargers or cables that are no longer used
A well-planned charging station should make charging simpler, not create another source of clutter. By selecting a suitable location, using reliable equipment, organising cables, and leaving enough space for ventilation, you can build a convenient station that keeps everyday devices ready when you need them.
